Water along several walls
Seepage at the base of more than one wall after rain means pressure along the perimeter, which a drain relieves all at once.
Basement & foundation · Jersey City, NJ
When groundwater keeps finding its way in at the base of your walls, coating the inside won't hold it back. We install a drain at footing level that collects the water and sends it to a sump before it reaches your floor.
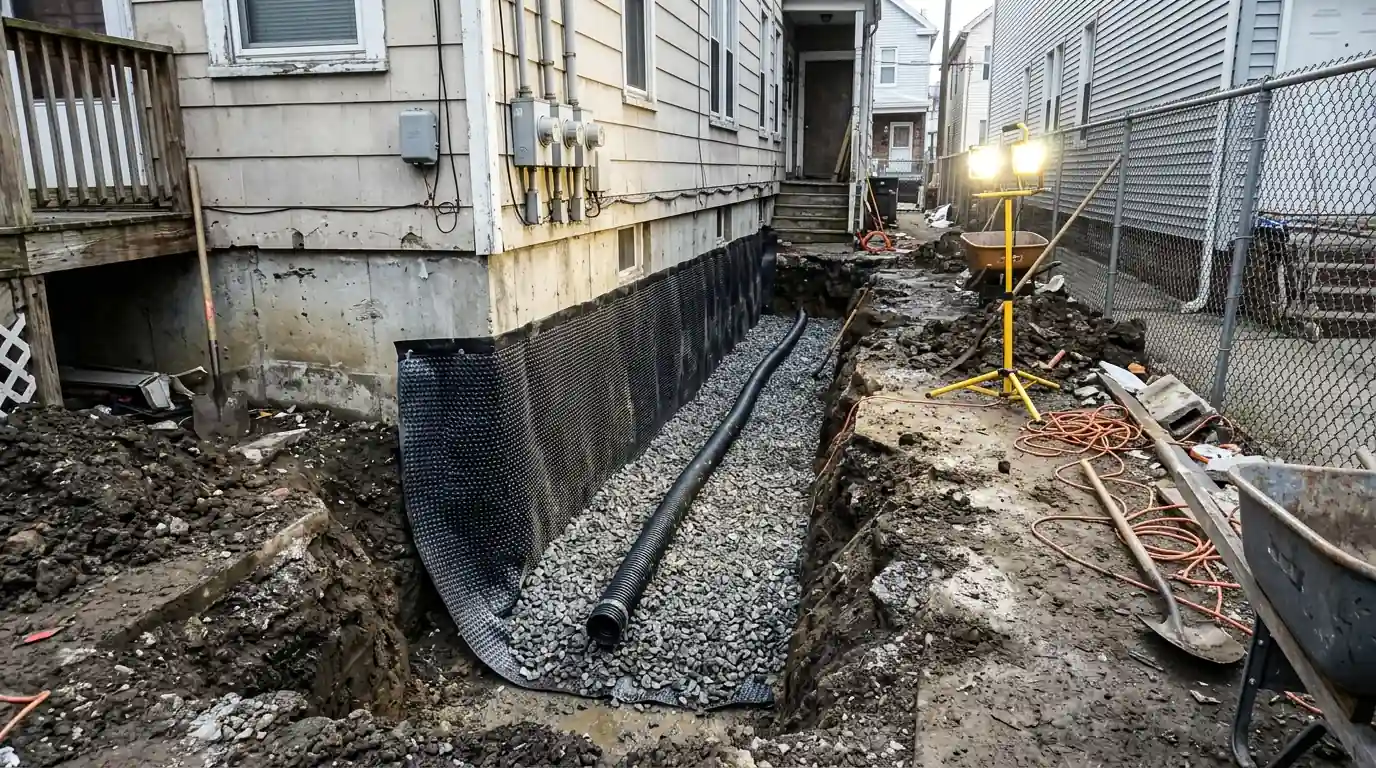
An interior drain system, also called an interior French drain, is a perforated pipe laid in stone beneath the slab along your basement walls. It catches water at the footing and carries it to a sump pump. We install them across Jersey City in rowhouses, frame houses and walk-ups, usually in two to four days. Call (201) 578-5199 to have a technician look at your basement.
Groundwater around a foundation is heavy, and after a long rain it presses on every square foot of wall and slab. That hydrostatic pressure is what pushes water through the cove joint, up through floor cracks and into tie-rod holes. Sealers and waterproof paint applied from inside are fighting that pressure from the losing side. The water stays in the wall, the coating loses its grip, and sooner or later it peels off in sheets.
An interior drain takes the opposite approach. Instead of trying to stop the water, it gives the water a path that's easier than coming through your floor. Pipe set in clean stone at footing level collects groundwater right where the pressure builds, and once that water has somewhere to go, the pressure under the slab drops. It's the same reason this method works so well on the filled, low ground near the Hudson, where the water table sits high after storms.
There's a practical side too. Because the system works from inside, we can reach every wall of an attached rowhouse, including the party walls you share with neighbors, without digging up a yard, a stoop or the sidewalk. It also works whatever the wall is made of, from century-old stone to modern poured concrete. The trade-off is that the wall itself still gets wet on the outside, so a pump has to carry the water away every time the drain fills.
Seepage at the base of more than one wall after rain means pressure along the perimeter, which a drain relieves all at once.
Coatings that blister and flake show water pushing out from inside the wall. Another coat will fail the same way.
Water rising through slab cracks away from the walls means pressure under the floor, not only at the joint.
A sump that stays empty while the floor floods has no drain feeding it. The water never reaches the pump.
Older houses sometimes have clay tile at the footing that has silted up or collapsed and no longer carries water.
A level stain or efflorescence band around the room shows how high groundwater has pushed in past storms.
Our crew cuts the slab in a strip along each wall that needs drainage, breaks it out and digs down to the top of the footing. We don't dig below the footing, since that can undermine the wall. The trench gets a bed of washed stone, then perforated drain pipe pitched toward the sump, then more stone over the top. Fine soil is the enemy of any drain, so the stone is clean and the pipe sits where silt has the least chance to clog it.
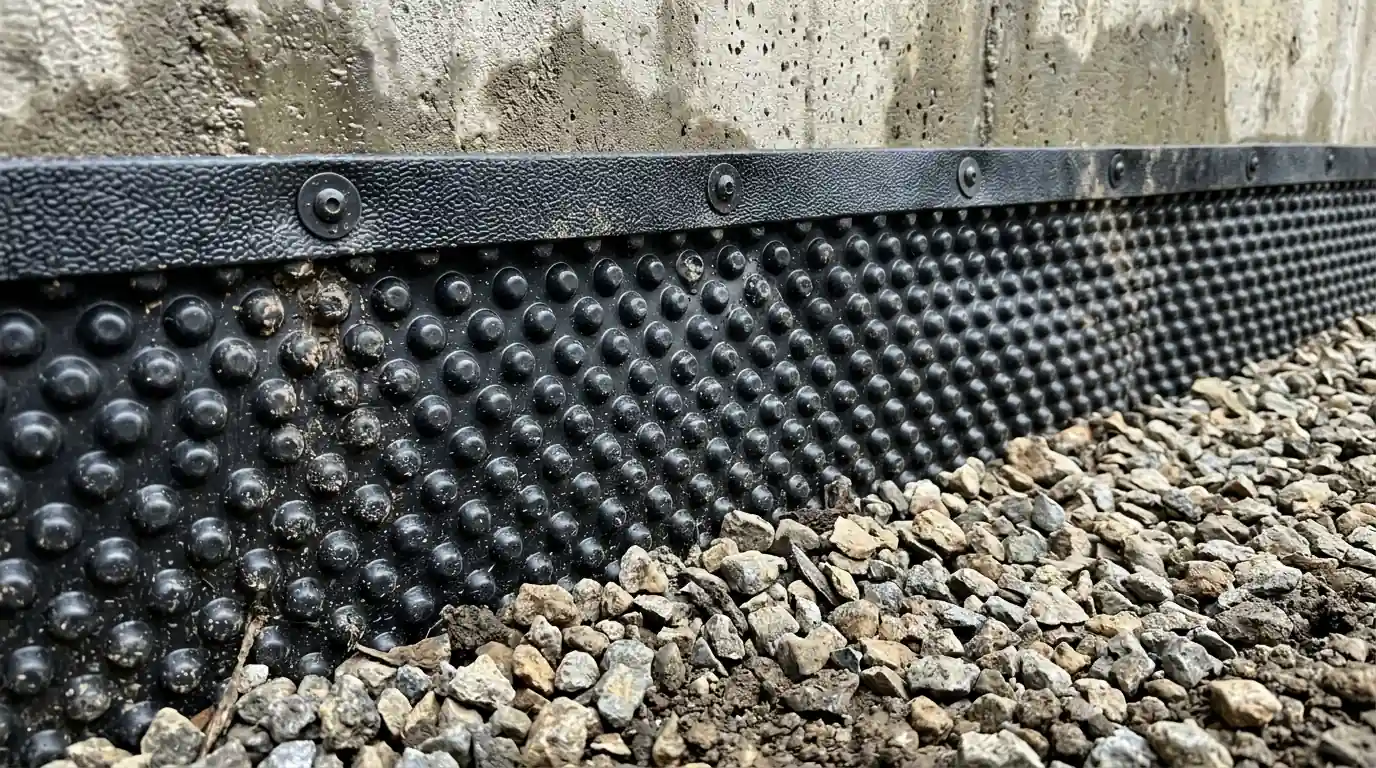
Before the trench is closed, we hang dimple membrane on the wall and lap it down into the stone. Water seeping through the wall face runs down behind the membrane and straight into the drain instead of onto the floor. On old brick and rubble-stone foundations this matters even more, because those walls weep across their whole surface. The membrane also leaves a clean, dry-looking wall you can finish later without trapping moisture against the masonry.
Old foundations need extra care at this stage. Rubble-stone and brick walls under downtown rowhouses often sit on wide, uneven footings, or on a bed of larger stones rather than a poured footing at all. We trench along the base by hand where the footing line is irregular, keep the cut away from loose stones, and set the pipe at the lowest level the wall allows. On poured walls the footing edge is clean and predictable, which makes the trench faster, but the same rule applies: we drain beside the footing, never under it.
We mark where water enters and where the sump should go based on the low point and the discharge route. That decides whether you need a full loop or a partial run.
We seal off the area and cut the slab with dust-controlled saws. The concrete is broken out and bagged for removal.
We excavate down to the top of the footing without going below it. Soil and debris leave the house in bags over protected floors.
Washed stone, perforated pipe and more stone go in, pitched to the sump. Dimple membrane goes on the wall and laps into the trench.
We set the basin, pump, check valve and discharge, and add the battery backup if chosen. Water is run through the drain to prove the flow.
New concrete goes in flush with the floor and cleanouts are capped at the corners. We clean the basement and show you how to test the pump.
Every run of pipe ends at a sump basin set below the floor. We install a sealed basin with a primary pump, a check valve so water doesn't drain back into the pit, and a discharge line that carries water well away from the foundation. Because the storms that load your drain are often the same storms that knock out power, we strongly suggest a battery backup pump. Our page on sump pump installation covers pump choices in detail.
We also put cleanout ports at the corners of the system, capped flush with the floor. Years from now, if silt or iron ochre slows the pipe, those ports let us flush the line with water instead of breaking concrete. Where a basement already has an old pump that keeps failing or running nonstop, we look at repairing it and adding a backup before deciding whether the pit itself needs replacing.
Once the drain is tested with water and the pump cycles properly, we pour new concrete over the stone and finish it flush with the existing floor. The membrane edge stays tucked behind the slab at the wall, so seepage still has its path down. Most owners can walk on the new concrete the next day and move light items back within a few days. Carpet or flooring should wait until the patch has fully dried.
Upkeep is simple. Pour a bucket of water into the sump every few months to watch the pump kick on, and check the battery backup the same way. Keep the discharge line clear of leaves and snow. If you also see water only where the floor meets one wall, our cove joint leak repair page explains when a partial run makes more sense than a full loop, and our interior vs exterior guide compares this system with digging outside.
| Drain type | How it collects water | Where it fits |
|---|---|---|
| Sub-slab perimeter drain | Pipe in stone at footing level, under the floor | Most wet basements, high water table, stone and brick walls |
| Baseboard channel on the slab | Plastic channel glued at the floor edge | Minor wall seepage only; does nothing for pressure under the slab |
| Exterior footing drain | Pipe outside the footing with membrane on the wall | Reachable walls, finished basements, new construction |
$68 to $112
per linear ft, typical range
Most interior drain jobs land within this per-foot range, with the sump and pump priced on top. Your number depends on what we find under the slab.
Not listed? See every area we serve or call (201) 578-5199.
Membranes, sealers, pumps and dehumidifiers we work with come from makers such as
We dig down to the top of the footing, which in most rowhouse and two-family basements means the trench is roughly a foot or so below the floor surface. We never dig below the footing, since that can weaken the wall. Where rock sits close under the slab, as it often does on the Heights, the trench may be shallower, and we adjust the pipe pitch to keep water moving.
Yes, when it includes wall membrane. The drain handles water at the footing and under the slab, and dimple membrane on the wall catches seepage coming through brick, stone or concrete and leads it down into the trench. Without membrane, water running down the wall still has to cross the floor edge, so we include it wherever walls are weeping.
The drain keeps collecting water, but with the pump down, the sump fills and eventually water backs up out of the pit. That's why we recommend a battery backup pump that takes over automatically when power fails or the main pump quits. Some owners also add a high-water alarm so they hear about trouble before the floor gets wet.
It can, if water truly enters along one wall only. A rear wall under a downspout or the front wall under an areaway is a common example. We run the drain along that wall to a sump. If other walls start showing water later, the system can be extended from the same pit.
Through the cleanout ports we leave capped at the corners of the system. We open them and flush the line with water to push out silt or iron deposits toward the sump, where they can be removed. No concrete has to be broken. Most systems in clean stone only need this occasionally, if at all.
Call (201) 578-5199 and tell us what you're seeing. We'll set up a visit and give you a typical range before any work starts.