Wet from top to bottom
Seepage high on the wall, not only at the floor, means water is coming through the wall face from the soil side.
Basement & foundation · Jersey City, NJ
If you want water stopped at the outside face of the wall, before it ever touches the masonry, the wall has to be dug out. We excavate to the footing, repair the wall, membrane it and lay new drains, then put the yard back.
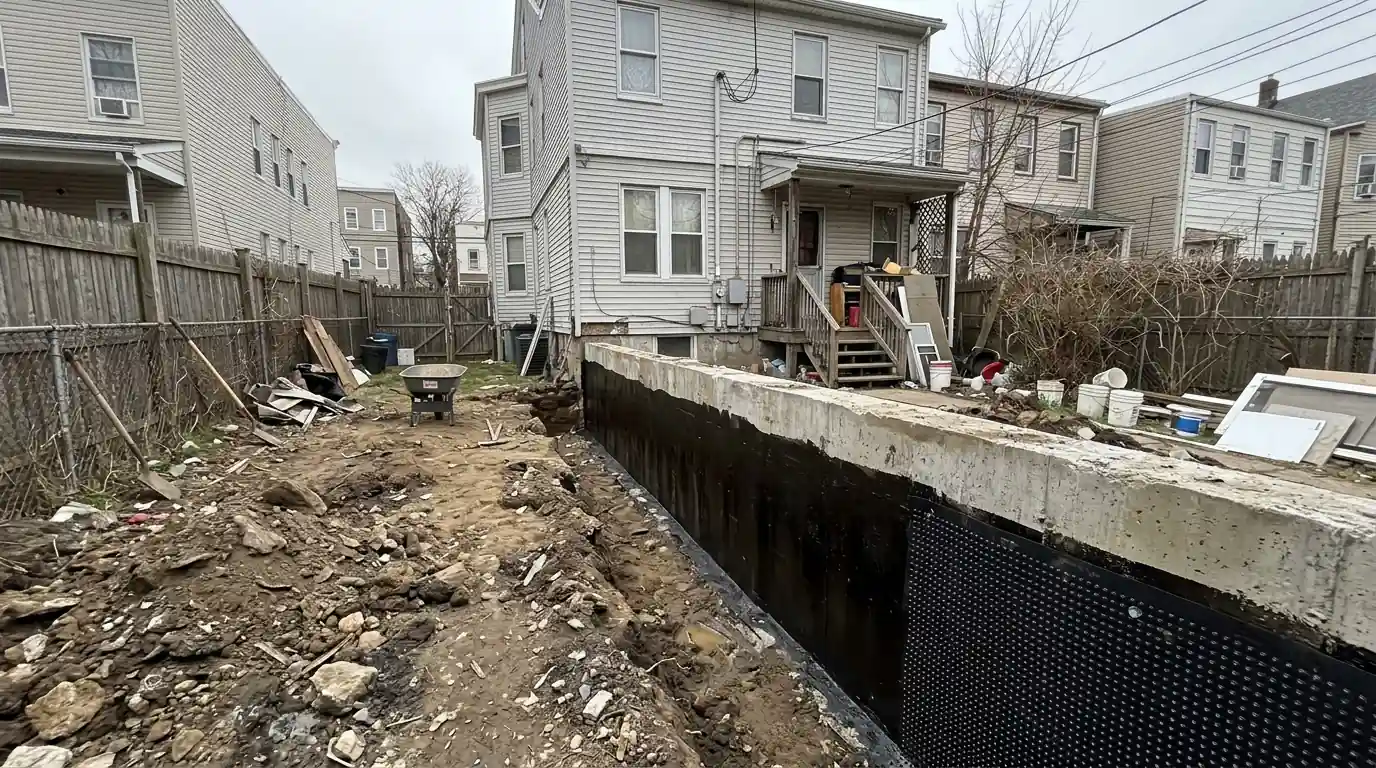
Exterior foundation waterproofing means excavating beside the wall down to the footing, cleaning and repairing it, applying a true waterproof membrane with drainage board, and laying a footing drain to a sump or daylight before backfilling. We do this in Jersey City wherever a wall can be reached, often the front or rear of a rowhouse. Call (201) 578-5199 to find out if your walls qualify.
Exterior waterproofing is the only method that keeps water from soaking into the foundation at all. That matters most in three situations. The first is a finished basement, where cutting the floor and opening walls from inside would mean tearing out drywall, built-ins or flooring. The second is a wall whose outer face is failing: old parging falling off, mortar washed out, or soil packed against bare block. The third is a wall that's wet across its whole height, not just at the bottom.
It's also the right call when the problem sits right at grade. A rear wall where the yard slopes toward the house, or a front wall below an areaway that collects water, often leaks from the top down. Fixing the outer face and grading the soil away from it solves the cause instead of collecting the result. If the same yard holds water everywhere, grading and yard drainage may be part of the fix too.
Exterior work also makes sense during other projects. If the yard is being dug up anyway for a new patio, a rear addition or underground leader drains, adding membrane and a footing drain while the trench is open costs far less than coming back later. The same goes for a front areaway being rebuilt. On the other hand, if water only appears at the floor edge and the basement is unfinished, an interior drain usually solves the leak for less money and with less disruption to the property.
Seepage high on the wall, not only at the floor, means water is coming through the wall face from the soil side.
Cement coating flaking off the outside of the foundation leaves bare block or brick open to soil moisture.
Yard grade that runs toward the wall sends every rainstorm straight down the foundation face.
Stains on drywall or baseboards in a finished basement often call for an outside fix that leaves the room intact.
Water pooling in a sunken front areaway soaks the foundation wall right beside it.
Downspouts that discharge at the foundation saturate the soil exactly where the wall is weakest.
Many foundations already have a thin black coating on the outside. In most cases that's damp-proofing: a sprayed or brushed asphalt layer meant to slow soil moisture, not to hold back water under pressure. It cracks when the wall moves, it doesn't bridge gaps, and it was never designed for a high water table. When we dig up a leaking wall, we often find that coating intact and the wall wet anyway.
Waterproofing is a different product. We use either a rubberized sheet membrane, lapped and sealed at the seams, or a thick liquid-applied membrane built up to a measured thickness. Both stretch over small cracks and stay stuck to the wall under water pressure. Sheet goods give a very consistent thickness; liquid membranes wrap around pipes, corners and irregular old masonry more easily. We choose based on the wall surface we uncover, and then protect the membrane with drainage board so backfill stones can't puncture it.
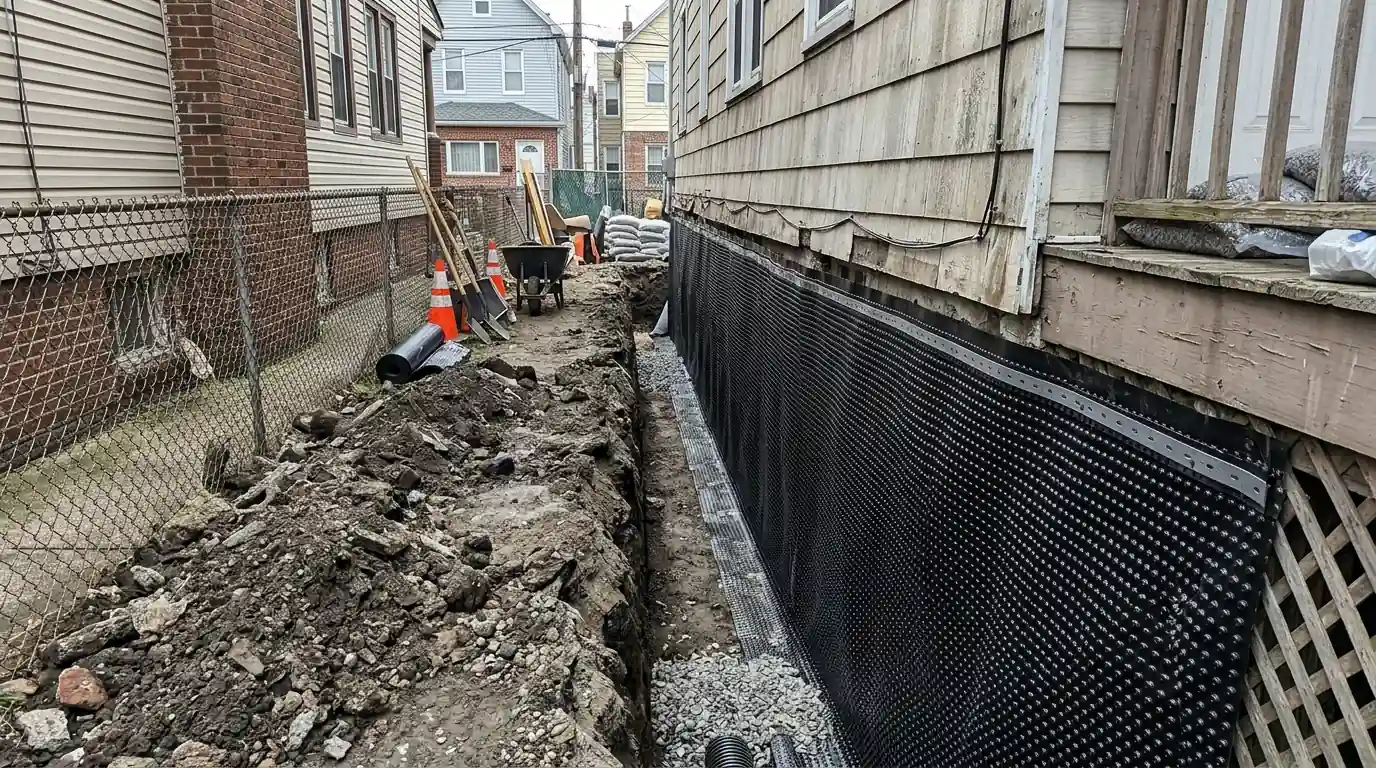
We mark out underground lines and plan where soil will be staged on the lot or sidewalk. We confirm which walls can be reached and how deep the footing sits.
We dig along the wall down to the footing, shoring the trench where depth or soil calls for it. Plantings and pavers are set aside to reuse where possible.
The wall is scraped and washed, then cracks, open joints and tie-rod holes are repaired. Loose parging is removed and the surface made sound.
We apply sheet or liquid membrane to the full wall height and seal it at the top. Drainage board goes over it to protect it and drain the soil side.
Perforated pipe in fabric-wrapped stone goes at the footing, pitched to a sump or daylight outlet. We test the flow with water before backfilling.
Soil goes back in compacted layers and the surface is graded away from the house. Walks and plantings are restored as agreed.
The wall comes clean first. We dig down to the footing, scrape and wash the wall, and repair what we find: open joints repointed, cracks sealed, loose parging removed and replaced. Tie-rod holes on poured walls get plugged before membrane goes on. Any problem left under the membrane would sit there for decades, so this is the slow, careful part of the job.
After the membrane comes dimpled drainage board, which holds an open air gap against the wall so water drops straight down instead of pressing on it. At the footing we lay perforated pipe in washed stone, wrapped in filter fabric, and run it either to a sump or to daylight where the lot slopes enough. On many Jersey City lots there's no low point to drain to, so a sump is the normal answer. We then backfill in layers, compacting as we go, and finish the grade sloping away from the wall.
Leaders get rerouted while the ground is open. A downspout that used to dump at the wall gets a solid pipe carried away from the house, never tied into the perforated footing drain, because roof water poured into that pipe would flood the very system meant to keep the wall dry. Window wells along the dug wall get their own drains connected to the footing line, so they stop filling during storms. These small details are what keep an exterior job working for decades instead of a few seasons.
Attached houses change the math. On a downtown rowhouse or brownstone, the side walls are party walls shared with the neighbors, and there's no way to dig along them from outside. Usually only the front wall, often under the areaway or stoop, and the rear wall facing the yard can be excavated. Front work may involve the sidewalk, so we plan staging, sidewalk protection and any city approvals that apply before we start.
That's why many of our rowhouse jobs combine methods: exterior membrane on the rear wall where the yard allows, and an interior perimeter drain along the party walls from inside. Detached two- and three-family houses in the Heights and Greenville usually give us more room, though tight side yards and neighboring fences still shape the dig. We walk the property with you and show you exactly which walls we can reach before we price anything.
| Option | What it does | Limits |
|---|---|---|
| Sheet membrane | Uniform rubberized barrier lapped at seams | Harder to detail on rough stone and around pipes |
| Liquid-applied membrane | Continuous coat that wraps corners and irregular masonry | Thickness depends on careful application |
| Asphalt damp-proofing | Slows soil moisture on the wall | Not built for water under pressure; cracks with movement |
| Interior drain instead | Relieves pressure from inside | Water still soaks the wall; needs a pump |
$145 to $310
per linear ft, typical range
Most exterior foundation jobs land in this range per linear foot of wall. Depth and access move it more than anything else; our cost guide explains how.
Not listed? See every area we serve or call (201) 578-5199.
Membranes, sealers, pumps and dehumidifiers we work with come from makers such as
Only on the walls that face the street or the yard. Party walls shared with neighbors can't be excavated from outside, so on attached rowhouses we usually membrane the rear wall and sometimes the front, then handle the party walls with interior drainage. We'll show you which walls are reachable before giving a price.
All the way to the footing, because the membrane and drain have to cover the full wall and the drain belongs at footing level. In many older Jersey City houses that's several feet below grade, and the exact depth varies with the basement height. Deep or loose trenches get shored for safety while the crew works in them.
Usually not. That thin black layer is most often asphalt damp-proofing, which slows soil moisture but isn't built to resist water under pressure or bridge cracks. If the wall behind it leaks, the fix is to clean it off where needed, repair the wall and apply a true membrane with drainage board over it.
Anything in the dig path has to come up. We set plantings and reusable pavers aside, protect what we can around the trench, and restore the surface after backfill as agreed before the job starts. Poured concrete patios or walks are cut, removed and replaced. We include that restoration in the scope so there's no surprise afterward.
Call (201) 578-5199 and tell us what you're seeing. We'll set up a visit and give you a typical range before any work starts.